vegan protein bars: indulgent oat‑nut delight that fuels your day
Introduction
Do you ever wonder if a vegan protein bars snack can truly satisfy a chocolate craving while still delivering a high protein punch? Many assume a plant‑based snack lacks the richness of dairy‑based bars, yet the science of protein powders and healthy fats tells a different story. In the first 100 words we’ll see how oat flour, nut butter, and chocolate chips create a sugar‑free, indulgent treat that works perfectly after a post‑workout session or as a midday pick‑me‑up.
Recent market reports show the plant‑based snack sector grew over 10 % last year, driven by consumers who want high protein options without refined sugar. This homemade batch lets you control every ingredient, ensuring a clean label and a texture that mimics a bakery‑style cookie dough.
Ready to test the theory? Let’s explore the step‑by‑step process that yields nine perfectly portioned bars.
Why vegan protein bars work for active lifestyles
vegan protein bars combine the steady energy of complex carbohydrates from oat flour with the muscle‑building power of vanilla protein powder. The addition of nut butter supplies unsaturated fat that supports heart health, while chocolate chips add a touch of indulgence without compromising the overall nutritional profile.
Because the recipe is completely vegan, it fits into most dietary patterns, including dairy‑free, egg‑free, and gluten‑sensitive plans (when using gluten‑free oat flour). The result is a balanced, portable snack that aligns with both performance and wellness goals.
Ingredients List
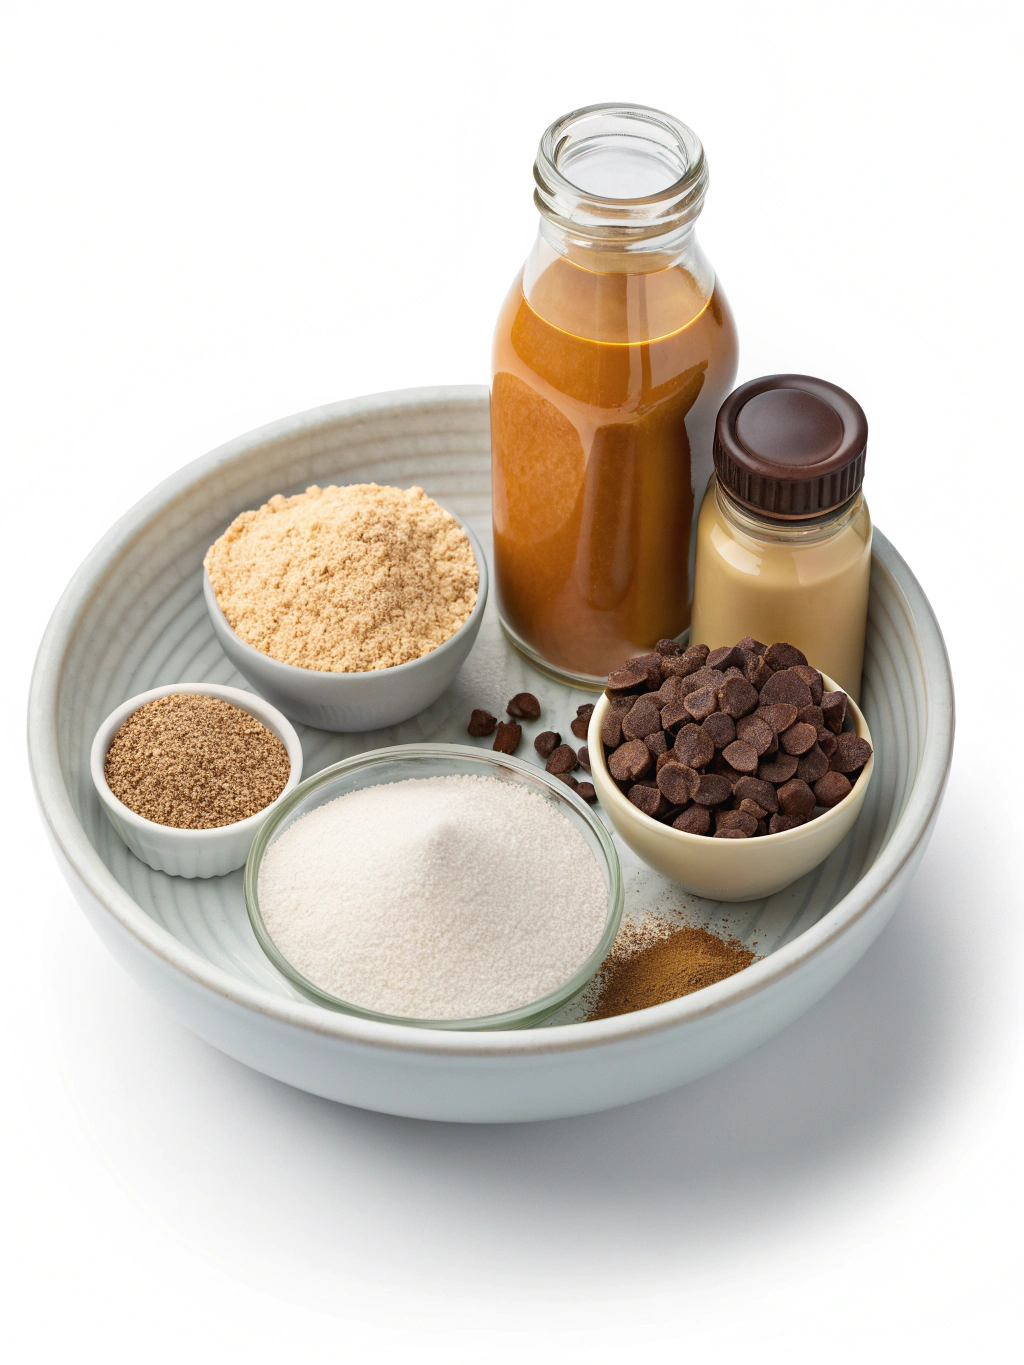
- oat flour – a soft, mildly sweet base; substitute with gluten‑free oat flour or almond flour for a low‑carb twist.
- vanilla protein powder – provides the high protein boost; pea or rice protein work equally well.
- salt – enhances flavor; sea salt or Himalayan pink salt are good options.
- nut butter – adds creaminess and healthy fat; almond, cashew, or sunflower butter can replace it.
- maple syrup – natural sweetener; agave nectar or a monk‑fruit blend can lower sugar further.
- soy milk – creates a smooth dough; oat or almond milk are suitable alternatives.
- vanilla extract – deepens aroma; a splash of almond extract adds a subtle nuance.
- chocolate chips – deliver a rich chocolate chip experience; dark, milk, or white chips all work.
Timing
Prep Time: 10 minutes
Cook Time: 2 hours
Total Time: 2 hours 10 minutes
This no‑bake method means you spend only a few minutes actively preparing, then let the freezer do the heavy lifting.
Step‑by‑Step Instructions
Step 1 – Line the pan
Line an 8‑inch baking pan with parchment paper. The parchment prevents sticking and makes bar removal effortless.
Step 2 – Whisk dry ingredients
In a medium bowl, whisk oat flour, vanilla protein powder, and salt together until fully blended. This ensures a uniform texture throughout the bar.
Step 3 – Incorporate wet ingredients
Add nut butter, maple syrup, soy milk, and vanilla extract to the dry mixture. Stir until a smooth dough forms, glossy and pliable.
Step 4 – Fold in chocolate chips
Gently fold the chocolate chips into the dough, preserving their shape for a satisfying bite.
Step 5 – Press the mixture
Transfer the dough to the prepared pan. Press it down evenly with a spatula or the back of a spoon, creating a flat, even surface.
Step 6 – Prepare the glaze
Heat the remaining chocolate chips with a spoonful of nut butter over low heat. Stir until a glossy glaze forms, then spread it over the pressed base.
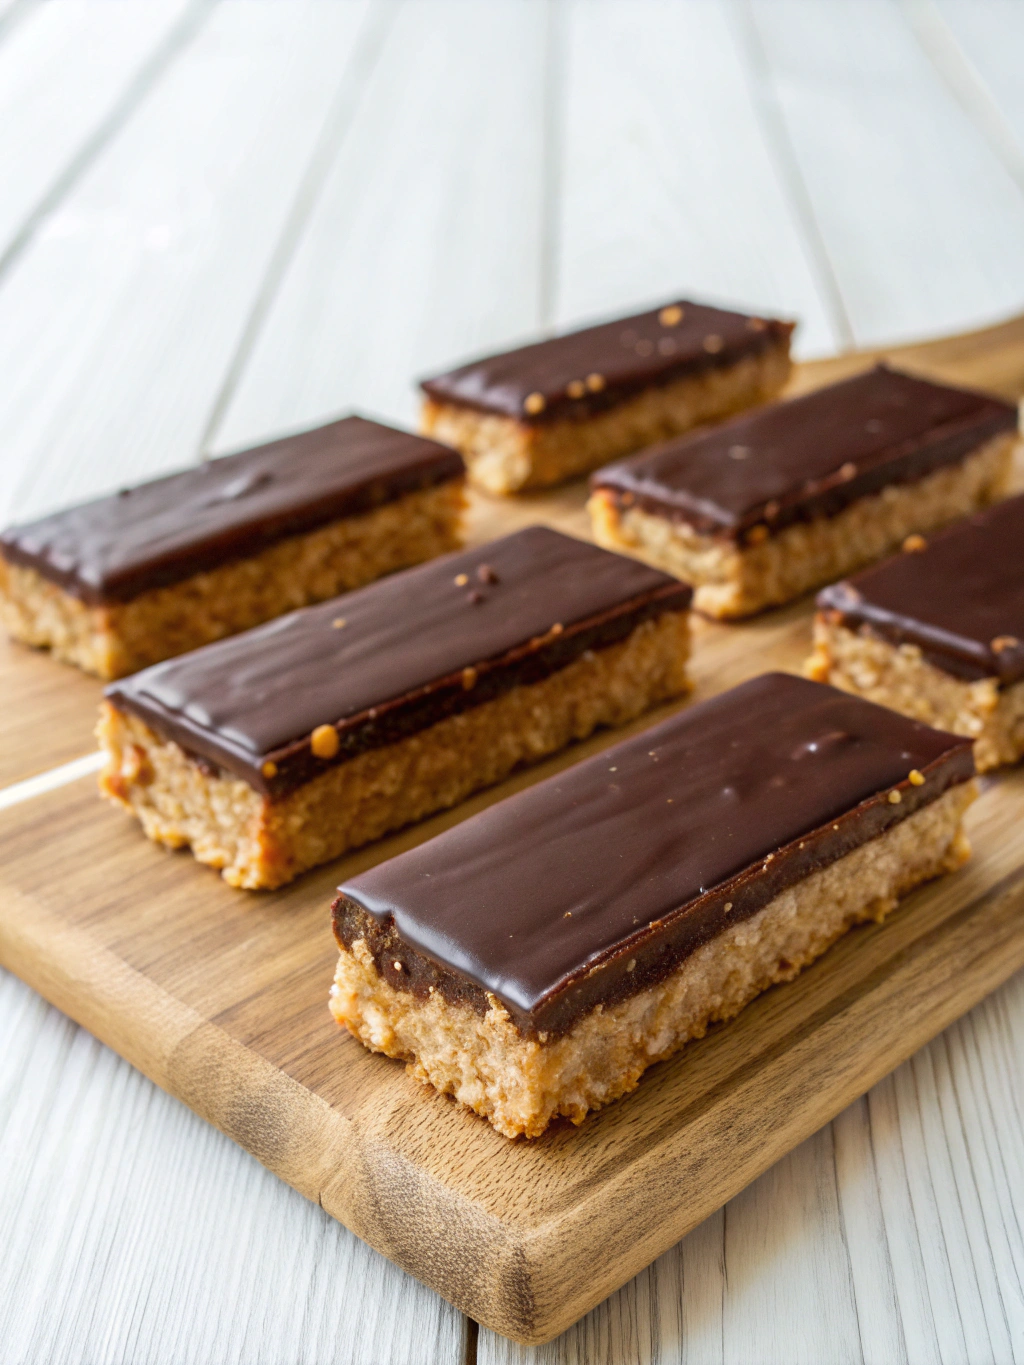
Step 7 – Chill and slice
Place the pan in the freezer for at least 2 hours. After chilling, lift the parchment paper and slice the slab into 9 bars.
vegan protein bars: indulgent oat‑nut delight that fuels your day
Ingredients
Equipment
Method
- Line an 8‑inch baking pan with parchment paper.
- Whisk oat flour, vanilla protein powder, and salt together.
- Add nut butter, maple syrup, soy milk, and vanilla extract, mixing into a smooth dough.
- Fold in chocolate chips and press the mixture evenly into the pan.
- Melt the remaining chocolate chips with a spoonful of nut butter and spread the glossy layer over the bars.
- Freeze for at least 2 hours, then slice into 9 bars.
Nutritional Information
Each serving (1 bar) provides the following per‑serving values:
- Calories: 296
- Carbohydrate: 38 g
- Protein: 12 g
- Fat: 16 g
- Saturated Fat: 3 g
- Trans Fat: 0 g
- Cholesterol: 0 mg
- Sodium: 150 mg
- Sugar: 17 g
- Unsaturated Fat: 13 g
These metrics illustrate a balanced macro profile that supports recovery while keeping added sugars moderate.
Healthier Alternatives for the Recipe
- Swap maple syrup for a sugar‑free monk‑fruit blend to cut the 17 g sugar per bar.
- Replace nut butter with pumpkin seed butter for extra magnesium and a nut‑free option.
- Use pea‑protein milk instead of soy milk to raise the protein content without altering flavor.
- Choose dark chocolate chips (70 % cocoa) to increase antioxidants and lower added sugar.
- Add a tablespoon of ground flaxseed for omega‑3 fatty acids and extra fiber.
Serving Suggestions
- Enjoy a bar with a handful of fresh berries for a bright, antioxidant‑rich snack.
- Crumb a bar over coconut‑yogurt and drizzle extra maple syrup for a quick breakfast parfait.
- Slice and layer on top of a smoothie bowl for added texture and protein.
- Wrap a bar in parchment, freeze, and pop it as a cool, ice‑cream‑like treat on hot days.
- Pair a bar with a cup of herbal tea for a calming, post‑dinner dessert.
Common Mistakes to Avoid
- Overmixing the dough creates a dense bar; blend just until smooth.
- Skipping parchment paper leads to sticking and uneven slices.
- Using too much chocolate in the glaze makes the bar overly sweet; keep the ratio balanced.
- Insufficient chilling results in a crumbly texture; honor the full 2‑hour freeze.
- Pressing the mixture loosely causes breakage; apply firm, even pressure.
Storing Tips for the Recipe
- Store sliced bars in an airtight container in the refrigerator for up to 5 days.
- Keep the whole slab wrapped in parchment and frozen for up to three months.
- Place a small silica packet in the container to absorb excess moisture.
- Separate glaze from the base with an extra parchment layer if you stack bars.
- Label the container with the preparation date to track freshness.
Frequently Asked Questions
- Can I use a different flavor of protein powder? Yes, any vanilla‑flavored plant‑based protein powder works well.
- Is this truly sugar‑free? The recipe natural sugars from maple syrup and chocolate chips, but no refined sugar.
- How long can I keep the bars frozen? Up to three months without noticeable texture loss.
- Can I make these gluten‑free? Substitute oat flour with certified gluten‑free oat flour or almond flour.
- Do I need to bake the bars? No, the recipe is entirely no‑bake; chilling sets the bars.
Conclusion
These vegan protein bars prove that indulgence and nutrition can live side by side. With oat flour, nut butter, and chocolate chips, you get a high protein, sugar‑free snack that feels like a dessert while fueling recovery. Whether you enjoy them post‑workout, as a homemade plant‑based snack, or as a quick afternoon pick‑me‑up, the recipe is simple, adaptable, and fully vegan. Try the batch, share your tweaks in the comments, and explore more nutritious snack ideas on our blog.