how to make rice crispy bars with peanut butter: a sweet delight
Introduction
Do you crave a quick, sweet treat that feels both indulgent and wholesome? This guide shows how to make rice crispy bars with peanut butter in just 30 minutes, using pantry staples you already have. The result is a chewy, crunchy bar that balances salty peanut butter with a hint of chocolate, making it a standout among peanut butter treats. Perfect for kids’ lunches, after‑school snacks, or a simple dessert, these bars fit into the category of easy desserts and no‑bake desserts. Let’s explore why this recipe has become a favorite among families looking for healthy snacks.
Whether you are a busy parent, a college student, or anyone who loves a fast, satisfying bite, learning how to make rice crispy bars with peanut butter will add a versatile option to your snack repertoire. The ingredients are simple, the steps are straightforward, and the flavor profile appeals to both children and adults. Below you will find a detailed walk‑through, nutrition facts, and ideas for customizing the bars to suit dietary preferences.
Ingredients List
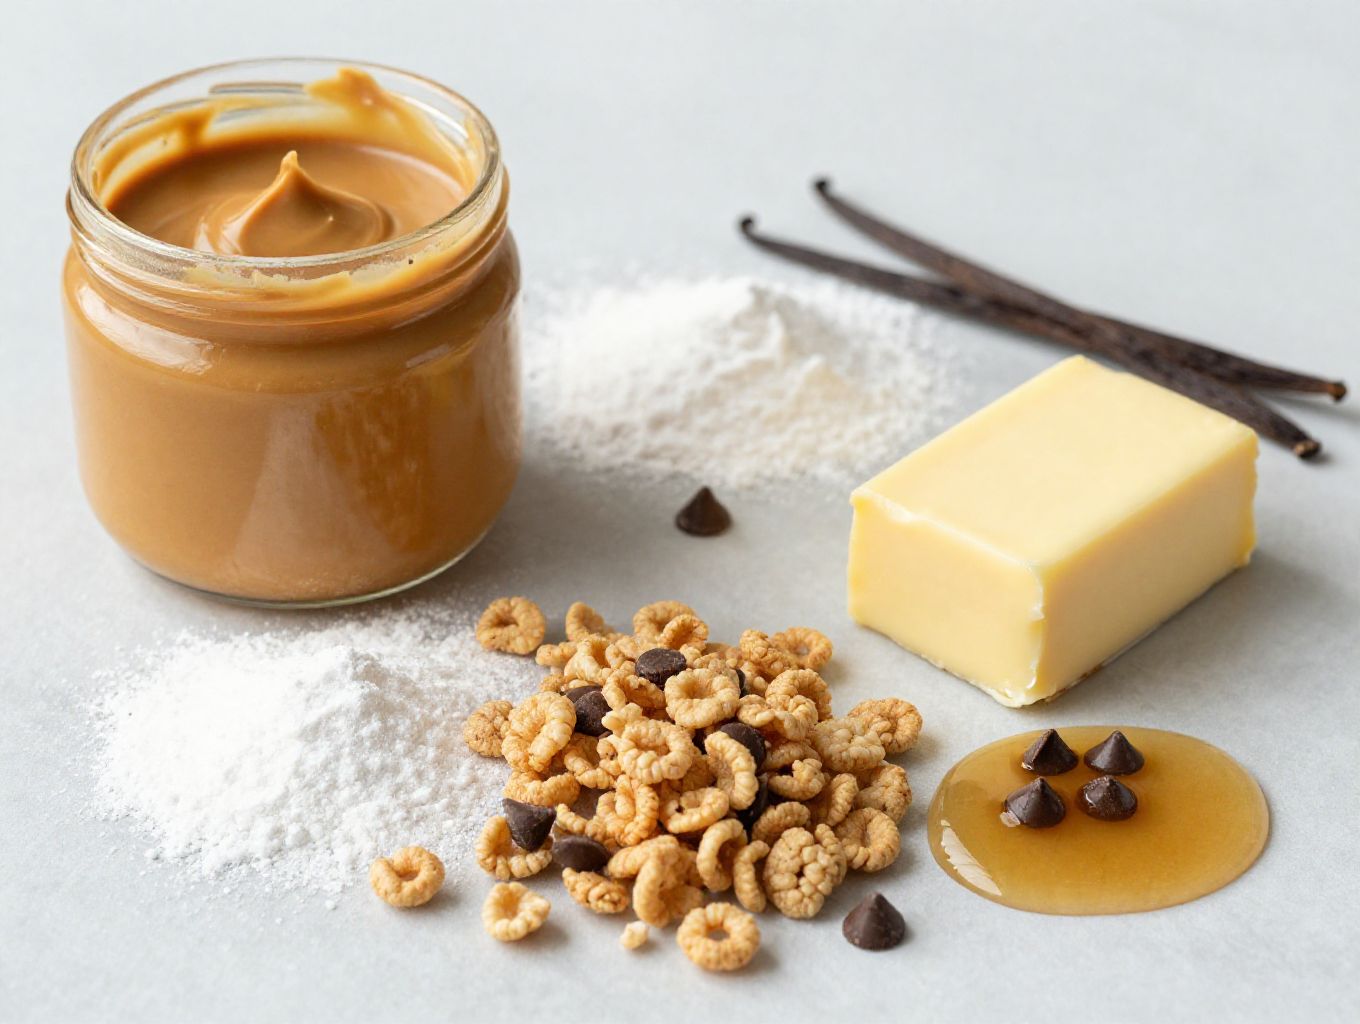
Gather the following items before you start. Each ingredient contributes to the texture, flavor, or structure of the final bars, and many have easy substitutions if you need to adjust for allergies or dietary goals.
- ¾ cup natural creamy peanut butter – provides protein and a rich, nutty base. Substitution: almond butter for a milder flavor or sunflower seed butter for a nut‑free version.
- 1 cup powdered sugar – sweetens without adding grainy texture. Substitution: coconut sugar powder for a lower glycemic option, or a blend of erythritol and stevia for fewer calories.
- 4 tablespoons salted butter – adds richness and helps bind the mixture. Substitution: coconut oil for a dairy‑free version, or a plant‑based butter spread.
- 3 ½ cups rice krispies cereal – creates the signature crunch that defines rice crispy bars. Substitution: puffed quinoa or gluten‑free puffed rice for extra fiber.
- 1 cup semi‑sweet chocolate chips – adds a glossy finish and deep flavor. Substitution: dark chocolate chips for less sugar, or dairy‑free chocolate chips for a vegan twist.
- ½ cup maple syrup – natural sweetener that blends smoothly with the butter and peanut butter. Substitution: honey, agave nectar, or a sugar‑free syrup.
- 1 teaspoon vanilla extract – enhances overall aroma and rounds out the sweetness. Substitution: almond extract for a nutty twist, or omit if unavailable.
Timing
Understanding the time commitment helps you fit this recipe into a busy schedule. The steps are quick, and the only waiting period is the chilling time.
Prep Time: 30 min – includes measuring, melting, and mixing.
Cook Time: 10 min – the brief heating of butter, peanut butter, and chocolate.
Total Time: 40 min – plus a 30‑minute refrigeration step, which is hands‑off.
Step-by-Step Instructions
Follow each step carefully to ensure the bars set properly and retain their chewy‑crunchy texture.
Step 1: Prepare the pan
Line an 8×8 inch baking pan with parchment paper. This prevents sticking and makes removal easy. The paper also helps keep the bars intact when cutting, especially for children’s snacks that need clean edges.
Step 2: Melt the butter and peanut butter
In a medium saucepan, melt the natural creamy peanut butter and salted butter together over low heat. Stir continuously until the mixture is smooth and glossy. Low heat prevents scorching, which could introduce a bitter taste.
Step 3: Add powdered sugar
Remove the saucepan from heat. Mix in the powdered sugar until fully combined, creating a thick, sweet paste. The sugar dissolves into the warm butter, ensuring a uniform texture without graininess.
Step 4: Incorporate the cereal
Stir in the rice krispies cereal until each piece is well‑coated with the peanut butter mixture. The cereal should look evenly glossy, indicating that the coating will hold together during chilling.
Step 5: Press into the pan
Pour the cereal mixture into the prepared pan. Press it down firmly with a spatula to create a solid, even layer. A compact base prevents the bars from crumbling when you cut them later.
Step 6: Melt the chocolate
In another bowl, melt the semi‑sweet chocolate chips in the microwave. Heat in 30‑second bursts, stirring between each burst until smooth. This method avoids overheating, which can cause the chocolate to seize.
Step 7: Add the chocolate topping
Pour the melted chocolate over the cereal layer. Spread it evenly with a spatula, allowing it to coat the surface fully. The chocolate layer adds a glossy finish and a contrasting flavor to the peanut butter base.
Step 8: Chill and cut
Refrigerate the pan for 30 minutes or until the bars are set. Once firm, cut into 16 squares and enjoy. Cutting while cold ensures clean edges and a tidy presentation.
Nutritional Information
All values are per serving (1 square). They are based on the ingredients listed above and calculated using USDA data.
- Calories: 367
- Carbohydrate: 54.77 g
- Protein: 6.74 g
- Fat: 13.60 g
- Saturated Fat: 5.32 g
- Trans Fat: 0.00 g
- Cholesterol: 8 mg
- Sodium: 60 mg
- Sugar: 14.36 g
- Unsaturated Fat: 8.28 g
Nutrition Information Source: Nutrition values are calculated per serving using data from USDA FoodData Central, the official U.S. government database for food composition. Values are approximate and may vary based on specific brands and preparation methods.
Healthier Alternatives for the Recipe
If you want to boost the nutritional profile while keeping the beloved flavor, consider these adjustments. Each suggestion maintains the core texture that makes these bars a go‑to snack.
- Swap powdered sugar with a blend of erythritol and stevia for a lower‑calorie sweetener, reducing overall sugar content.
- Use whole‑grain puffed rice instead of regular rice krispies to increase fiber and add a subtle nutty note.
- Replace semi‑sweet chocolate chips with 70% dark chocolate for less sugar and more antioxidants, turning the bars into a more heart‑healthy option.
- Choose a natural peanut butter without added sugar or oil to cut unnecessary fats and keep the protein punch.
- Incorporate a tablespoon of chia seeds or ground flaxseed for omega‑3 fatty acids and a slight crunch.
Serving Suggestions
These bars are versatile enough to shine in many settings. Pair them with complementary foods to create balanced snacks.
- Serve bars with a side of fresh berries for a burst of acidity that cuts through the sweetness.
- Pair with a glass of cold milk, soy milk, or almond milk for a classic snack combo that adds calcium.
- Top each square with a drizzle of extra melted chocolate or a sprinkle of sea salt for an indulgent finish.
- Cut bars into bite‑size pieces for a party platter of children’s snacks that are easy for little hands.
- Wrap individual squares in parchment for on‑the‑go healthy snacks, perfect for lunchboxes or picnics.
Common Mistakes to Avoid
Even simple recipes can go awry if you overlook a few key points. Here are the most frequent errors and how to prevent them.
- Overheating the peanut butter and butter can cause a burnt flavor; keep heat low and stir constantly.
- Skipping the parchment paper makes removal difficult and can break the bars, especially when serving children’s snacks.
- Not pressing the cereal mixture firmly leads to crumbly squares that fall apart when lifted.
- Leaving the chocolate topping too thin results in a dry surface that lacks the glossy finish expected of no‑bake desserts.
- Cutting the bars before they are fully set causes uneven pieces and a messy presentation.
Storing Tips for the Recipe
Proper storage extends freshness and keeps texture consistent, ensuring each bite remains as delightful as the first.
- Store the bars in an airtight container in the refrigerator for up to 5 days; the cool environment keeps the chocolate firm.
- For a softer texture, let the bars sit at room temperature for 10 minutes before serving.
- Freeze individual squares in a zip‑top bag for up to 2 months; thaw in the fridge to avoid condensation.
- Place a sheet of wax paper between layers to prevent sticking, especially if you stack multiple containers.
- Re‑heat briefly in the microwave for a melty chocolate top if you prefer a warm dessert experience.
Conclusion
Now you know exactly how to make rice crispy bars with peanut butter in a short time, using simple pantry items. These peanut butter treats are perfect for busy families, offering a sweet, salty, and crunchy bite that satisfies cravings without a lot of fuss. Experiment with the healthier alternatives or add your favorite toppings to make each batch uniquely yours. Share the bars with friends, pack them for school, or keep them on hand for a quick snack. Try the recipe today and enjoy the delicious results!
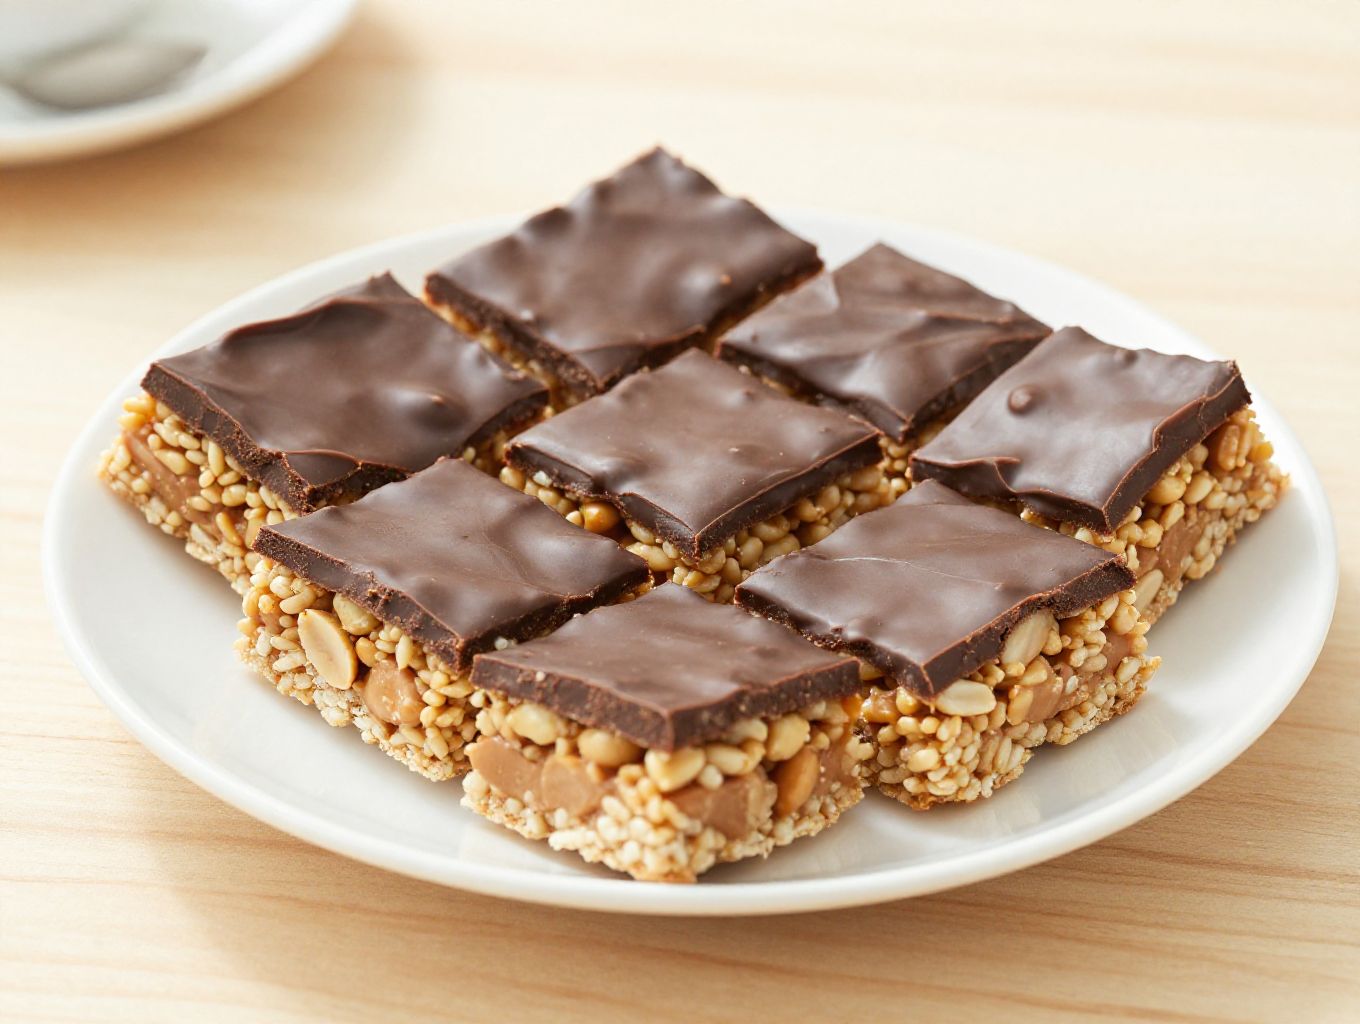
Peanut Butter Rice Krispie Bars
Ingredients
Method
- Line an 8x8 inch baking pan with parchment paper.
- In a medium saucepan, melt the peanut butter and salted butter together over low heat, stirring until smooth.
- Remove from heat and mix in the powdered sugar until fully combined.
- Stir in the rice krispies until well-coated with the peanut butter mixture.
- Pour the mixture into the prepared pan, pressing it down evenly and firmly to create a solid layer.
- In another bowl, melt the chocolate chips in the microwave, stirring every 30 seconds until smooth.
- Pour the melted chocolate over the cereal mixture, spreading it evenly.
- Refrigerate for 30 minutes or until set, then cut into 16 squares. Enjoy!
Notes
FAQs
- Can I substitute the peanut butter with another nut butter? Yes, almond or cashew butter work well and keep the creamy texture.
- How long do the bars stay fresh at room temperature? They can last up to 2 days if kept in a sealed container away from heat.
- Is it possible to add dried fruit for extra flavor? Absolutely, adding raisins or dried cranberries adds chewiness and nutrients. For guidance on fruit intake, see Harvard’s guidance on fruit and vegetable intake.
- Are these bars suitable for gluten‑free diets? Yes, as long as the rice krispies cereal is certified gluten‑free.
- Can I make these bars vegan? Replace the butter with coconut oil and use dairy‑free chocolate chips to keep the recipe vegan.