fruit gummies burst of vibrant flavor with wholesome goodness
Why fruit gummies are the perfect snack?
Do you ever wonder if a sweet treat can also support a balanced diet? Many people assume that chewy snacks are loaded with artificial flavors and excess sugar, yet a well‑crafted batch of fruit gummies can defy that myth. By using fruits like berries, carrots and dates, you create a fruit gummies experience that feels indulgent while delivering genuine nutrition. This recipe proves that a healthy snack can be both vibrant and kid friendly, satisfying cravings without the crash.
In the next few minutes you’ll learn how to transform simple whole ingredients into a batch of fruit gummies that are low sugar, packed with real fruit flavor, and perfect for lunchboxes or after‑school treats. Let’s dive into the details and see why this homemade gummies recipe stands out.
Ingredients List
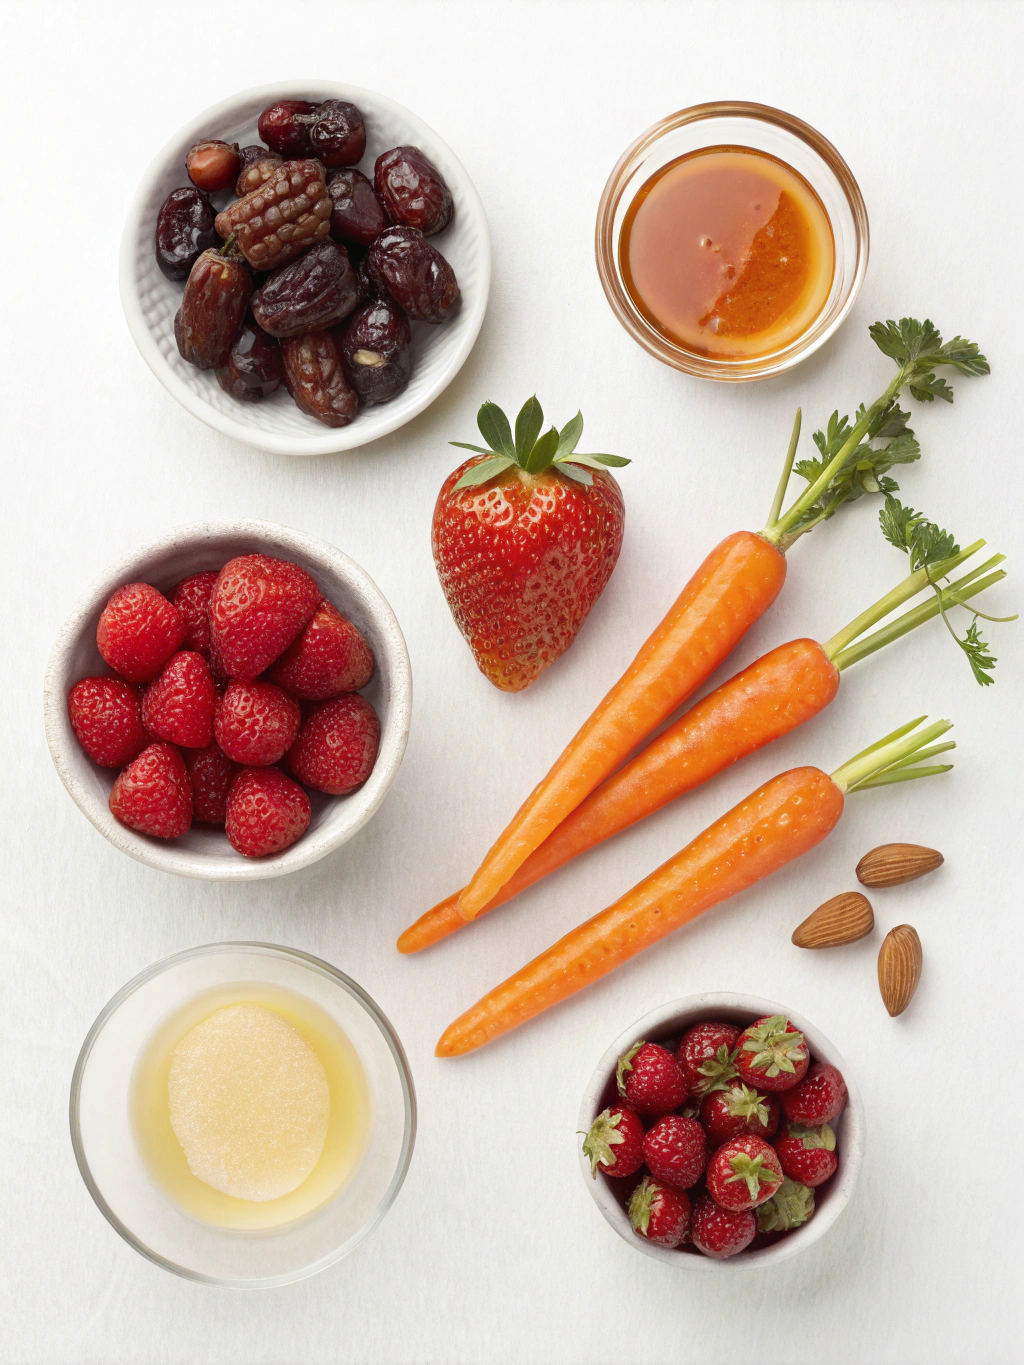
- Frozen berries – a sweet tart base that adds antioxidant power.
- Strawberries – fresh and fragrant, they boost the natural pink hue.
- Carrots – subtly sweet, they bring a smooth texture and extra beta‑carotene.
- Dates – natural sweeteners that keep the sugar level low while adding chewiness.
- Honey – a touch of golden sweetness and soothing flavor.
- Vanilla essence – a fragrant note that rounds out the fruit profile.
- Water – the binding liquid for a silky puree.
- Gelatin – setting agent that gives the gummies their classic bite.
If you need a dairy‑free version, replace gelatin with agar‑agar; the texture will be slightly firmer but still delightful. For a vegan sweetener, swap dates with maple syrup, remembering that the overall sugar count may shift.
Timing
Prep Time: 10 mins
Cook Time: 5 mins
Total Time: 1 hour 15 mins
The short hands‑on time makes this recipe ideal for busy families. While the gummies set in the refrigerator, you can prepare a quick fruit salad or tidy up the kitchen.
Step-by-Step Instructions
Step 1 – Blend the base
Combine frozen berries, strawberries, carrots, dates, honey, vanilla essence and water in a high‑speed blender. Blend until the mixture is completely smooth, resembling a thick fruit puree.
Step 2 – Gently heat the puree
Transfer the puree to a saucepan and warm over low heat. Stir continuously until it just begins to simmer; avoid boiling to preserve the bright color and delicate flavors.
Step 3 – Bloom and add gelatin
In a small bowl, sprinkle gelatin over a splash of cold water. Let it sit for a minute to bloom, then stir the gelatin into the warm puree. Continue stirring until the gelatin fully dissolves and the mixture looks glossy.
Step 4 – Fill the molds
Pour the liquid into silicone gummy molds. Tap the tray gently on the counter to release any trapped air bubbles that could create hollow spots.
Step 5 – Chill and release
Place the filled molds in the refrigerator for at least one hour. Once set, pop the gummies out of the molds and enjoy straight away or store as described below.
Nutritional Information
All values are per serving (1 gummy):
- Calories: 34
- Carbohydrate: 7 g
- Protein: 1.6 g
- Fat: 0 g
- Saturated Fat: 0 g
- Trans Fat: 0 g
- Unsaturated Fat: 0 g
- Cholesterol: 0 mg
- Sodium: 2 mg
- Sugar: 5 g
This profile shows a modest calorie count and low sodium, making the gummies a suitable option for a low sugar diet while still delivering natural sweetness from dates and honey.
Healthier Alternatives for the Recipe
- Swap honey for a teaspoon of stevia to further reduce sugar.
- Use unsweetened applesauce instead of dates for a milder sweetness and extra fiber.
- Replace gelatin with plant‑based agar‑agar for a vegan version; use 1 g agar for every 4 g gelatin.
- Add a pinch of sea salt to enhance fruit flavors without raising sodium significantly.
Each modification keeps the core idea of a real fruit based snack while tailoring it to specific dietary preferences.
Serving Suggestions
Pair a handful of gummies with a dollop of Greek yogurt for a protein boost. They also work well as a topping for oatmeal or as a colorful addition to a fruit platter.
For a festive twist, dust the gummies lightly with cocoa powder before serving. This adds a subtle bitterness that balances the natural sweetness.
When entertaining guests, arrange the gummies on a platter alongside fresh fruits slices for an eye‑catching, kid friendly snack board.
Common Mistakes to Avoid
- Over‑heating the puree – boiling can dull the bright berry hue.
- Skipping the blooming step – gelatin won’t dissolve evenly and may leave grainy spots.
- Using too large a mold – larger pieces need longer chilling time to set fully.
- Neglecting to tap molds – trapped air creates hollow centers that affect texture.
Storing Tips for the Recipe
- Keep the gummies in an airtight container in the refrigerator for up to one week.
- Layer a sheet of parchment paper between layers to prevent sticking.
- If you need to transport them, place the container in a cooler bag with an ice pack.
- For longer storage, freeze the gummies on a tray, then transfer to a zip‑lock bag; they stay fresh for up to two months.
Conclusion
This fruit gummies recipe blends the sweetness of real fruit with a light, chewable texture that feels indulgent without the guilt. By following the simple five‑step method, you can create a kid friendly snack that qualifies as a healthy snack, a low sugar treat, and a proud example of homemade gummies. Try the batch today, share your results in the comments, and explore more wholesome snack ideas on our blog.
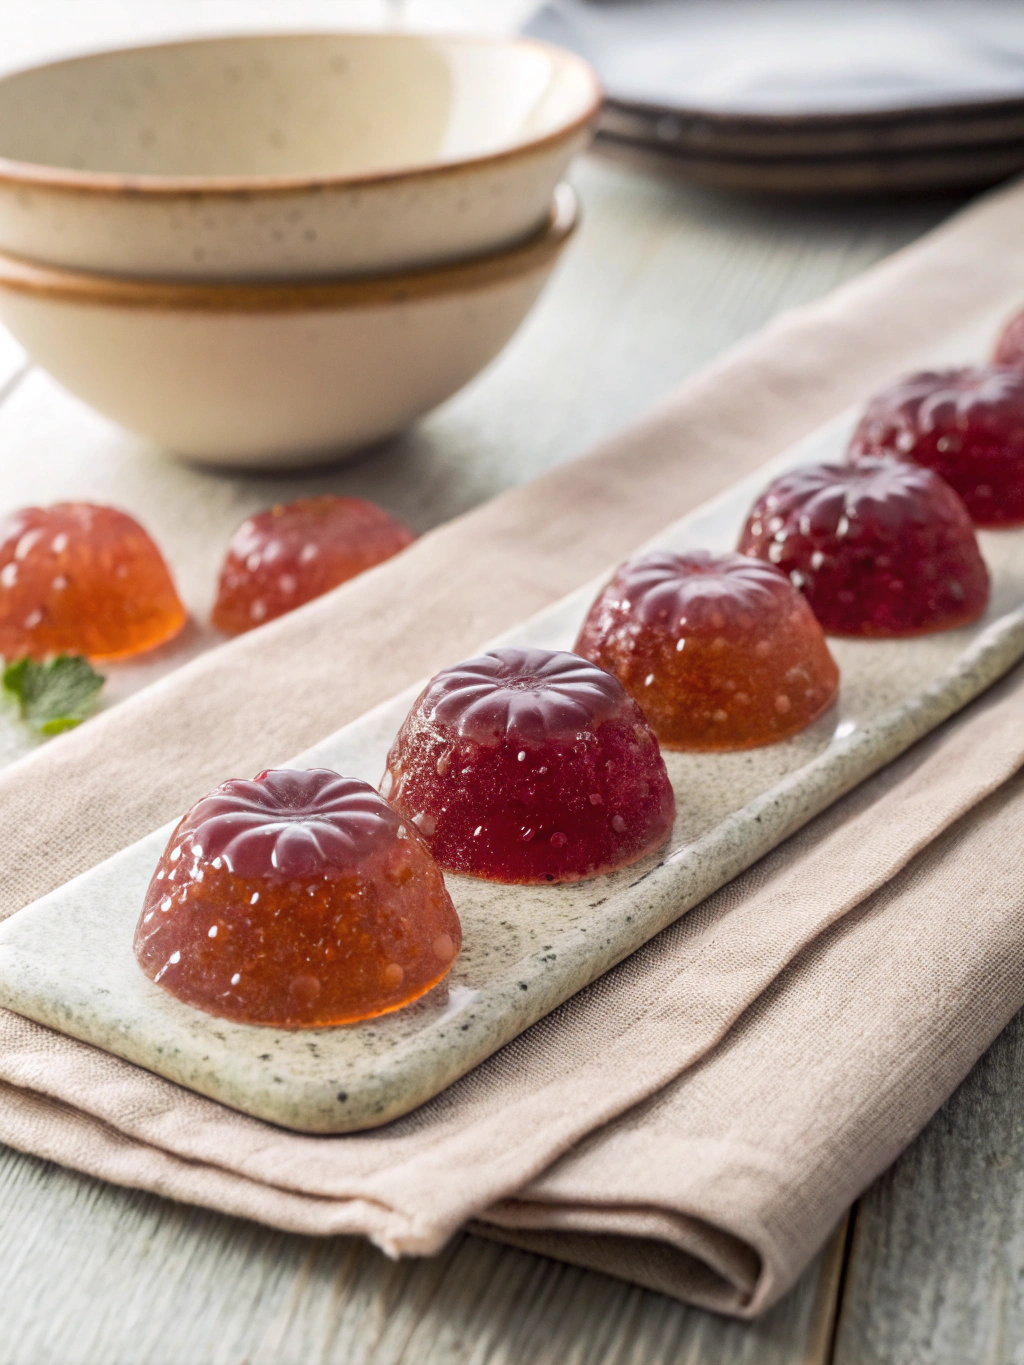
fruit gummies burst of vibrant flavor with wholesome goodness
Ingredients
Equipment
Method
- Blend frozen berries, strawberries, carrots, dates, honey, vanilla essence and water until smooth.
- Heat the puree over low heat until just simmering.
- Sprinkle gelatin over a small amount of cold water, let it bloom, then stir into the warm puree until fully dissolved.
- Pour the mixture into silicone gummy molds, tapping to release air bubbles.
- Refrigerate for at least one hour until set, then pop out the gummies and enjoy.
FAQs
- Can I use fresh berries instead of frozen? Yes, fresh berries work fine; just add a splash of water to help blend.
- Is gelatin necessary for the texture? Gelatin gives the classic gummy bite, but agar‑agar can replace it for a vegan version.
- How long do the gummies stay fresh? Stored in the fridge, they stay good for about a week.
- Can I reduce the honey for a lower sugar count? Absolutely, you can halve the honey or use a sugar‑free sweetener.
- Are these gummies suitable for children with nut allergies? The recipe contains no nuts, making them safe for nut‑free diets.